I recently(well probably/maybe more than a year or two ago :-p) rebuilt my site/blog using Hugo and deployed it on Cloudflare Pages. This post describes the full setup, from the Hugo project to a live custom domain with automatic deploys from a private repo on GitHub.
Why Hugo + Cloudflare Pages Link to heading
- Hugo is a fast static site generator written in Go. No runtime dependencies, builds in milliseconds, and has a solid theme ecosystem.
- Cloudflare Pages offers unlimited bandwidth, automatic Git-based deploys, a global CDN, and a generous free tier.
- Combined, the entire stack costs $0 - not including the cost of a custom domain (you can transfer the domain to Cloudflare and they used to charge $10 for renewals a while back).
- Also I feel these days its probably better to not be reliant on GitHub given their famous uptime charts at the time of writing this post(maybe I will move this to Codeberg in future or self host).
Step 1: Set Up Hugo Link to heading
Install Hugo via Homebrew:
brew install hugo
Create a new site:
hugo new site sandhar --format toml
cd sandhar
Hugo uses hugo.toml as its primary configuration file. I set mine up with:
baseURL = "https://sandhar.au/"
title = "Gurinder Sandhar"
theme = "hugo-coder"
locale = "en"
paginate = 20
I chose the hugo-coder theme - a minimal, responsive theme that looks clean on both desktop and mobile.
Add it as a Git submodule:
git init
git submodule add https://github.com/luizdepra/hugo-coder.git themes/hugo-coder
Step 2: Configure the Theme Link to heading
Update hugo.toml with theme settings: author info, social links, navigation menu, color scheme, and Content Security Policy headers (CSP is built into the coder theme).
The key sections of my config:
- Navigation menu : four items pointing to
/about/,/posts/,/projects/,/recipes/ - Social links : LinkedIn and GitHub
- Color scheme :
darkwith the toggle button enabled - Taxonomies :
categories,series,tags, andauthors
Check the hugo-coder docs for the exact config format for each section.
Add a .gitignore so you don’t commit generated files:
public/
resources/
Run the dev server to preview:
hugo server -D
Open http://localhost:1313 to see your site live with hot reload.
Step 3: Create Content Link to heading
Hugo content lives under content/. I organised mine as below:
content/
├── about.md          # About page (root level)
├── projects.md       # Projects page (root level)
├── posts/            # Blog posts
│   ├── 2024/
│   │   └── docker-platform-flag/
│   │       └── index.md
│   ├── 2025/
│   │   └── ai-background-remover/
│   │       └── index.md
│   └── 2026/
│       └── cloudflare-hugo-site/
│           └── index.md
└── recipes/          # Recipe posts
    ├── brownie.md
    ├── pizza-dough.md
    └── vegetable-galette.md
Root .md files (like about.md) are standalone pages with their own URLs. Subdirectories with index.md form page bundles - handy when you want to colocate images with a post.
Each post has TOML front matter:
+++
draft = false
date = 2026-06-03T09:00:00+10:00
title = "My Post Title"
description = "A brief description"
slug = "my-post-slug"
authors = "Gurinder Sandhar"
+++
The slug controls the URL path. Without it, Hugo uses the filename.
Step 4: Push to GitHub Link to heading
git add .
git commit -m "Initial Hugo site with coder theme"
git remote add origin git@github.com:userName/sandhar.git
git push -u origin main
Cloudflare Pages auto detects Hugo projects, so no extra config needed.
Step 5: Deploy to Cloudflare Pages Link to heading
- Go to Cloudflare Dashboard > Workers & Pages > Pages > Create a project > Connect to Git
- Select your GitHub repository
- Configure the build:
- Framework preset: Hugo
- Build command:
hugo(Cloudflare sets this automatically) - Build output directory:
public(also auto-detected) - Environment variable:
HUGO_VERSION=0.162.1(pin your Hugo version)
- Click Save and Deploy
Cloudflare will clone your repo, run hugo, and deploy the public/ folder to their global CDN. Every git push triggers a new deploy automatically.
The first deploy gives you a *.pages.dev subdomain to test with.
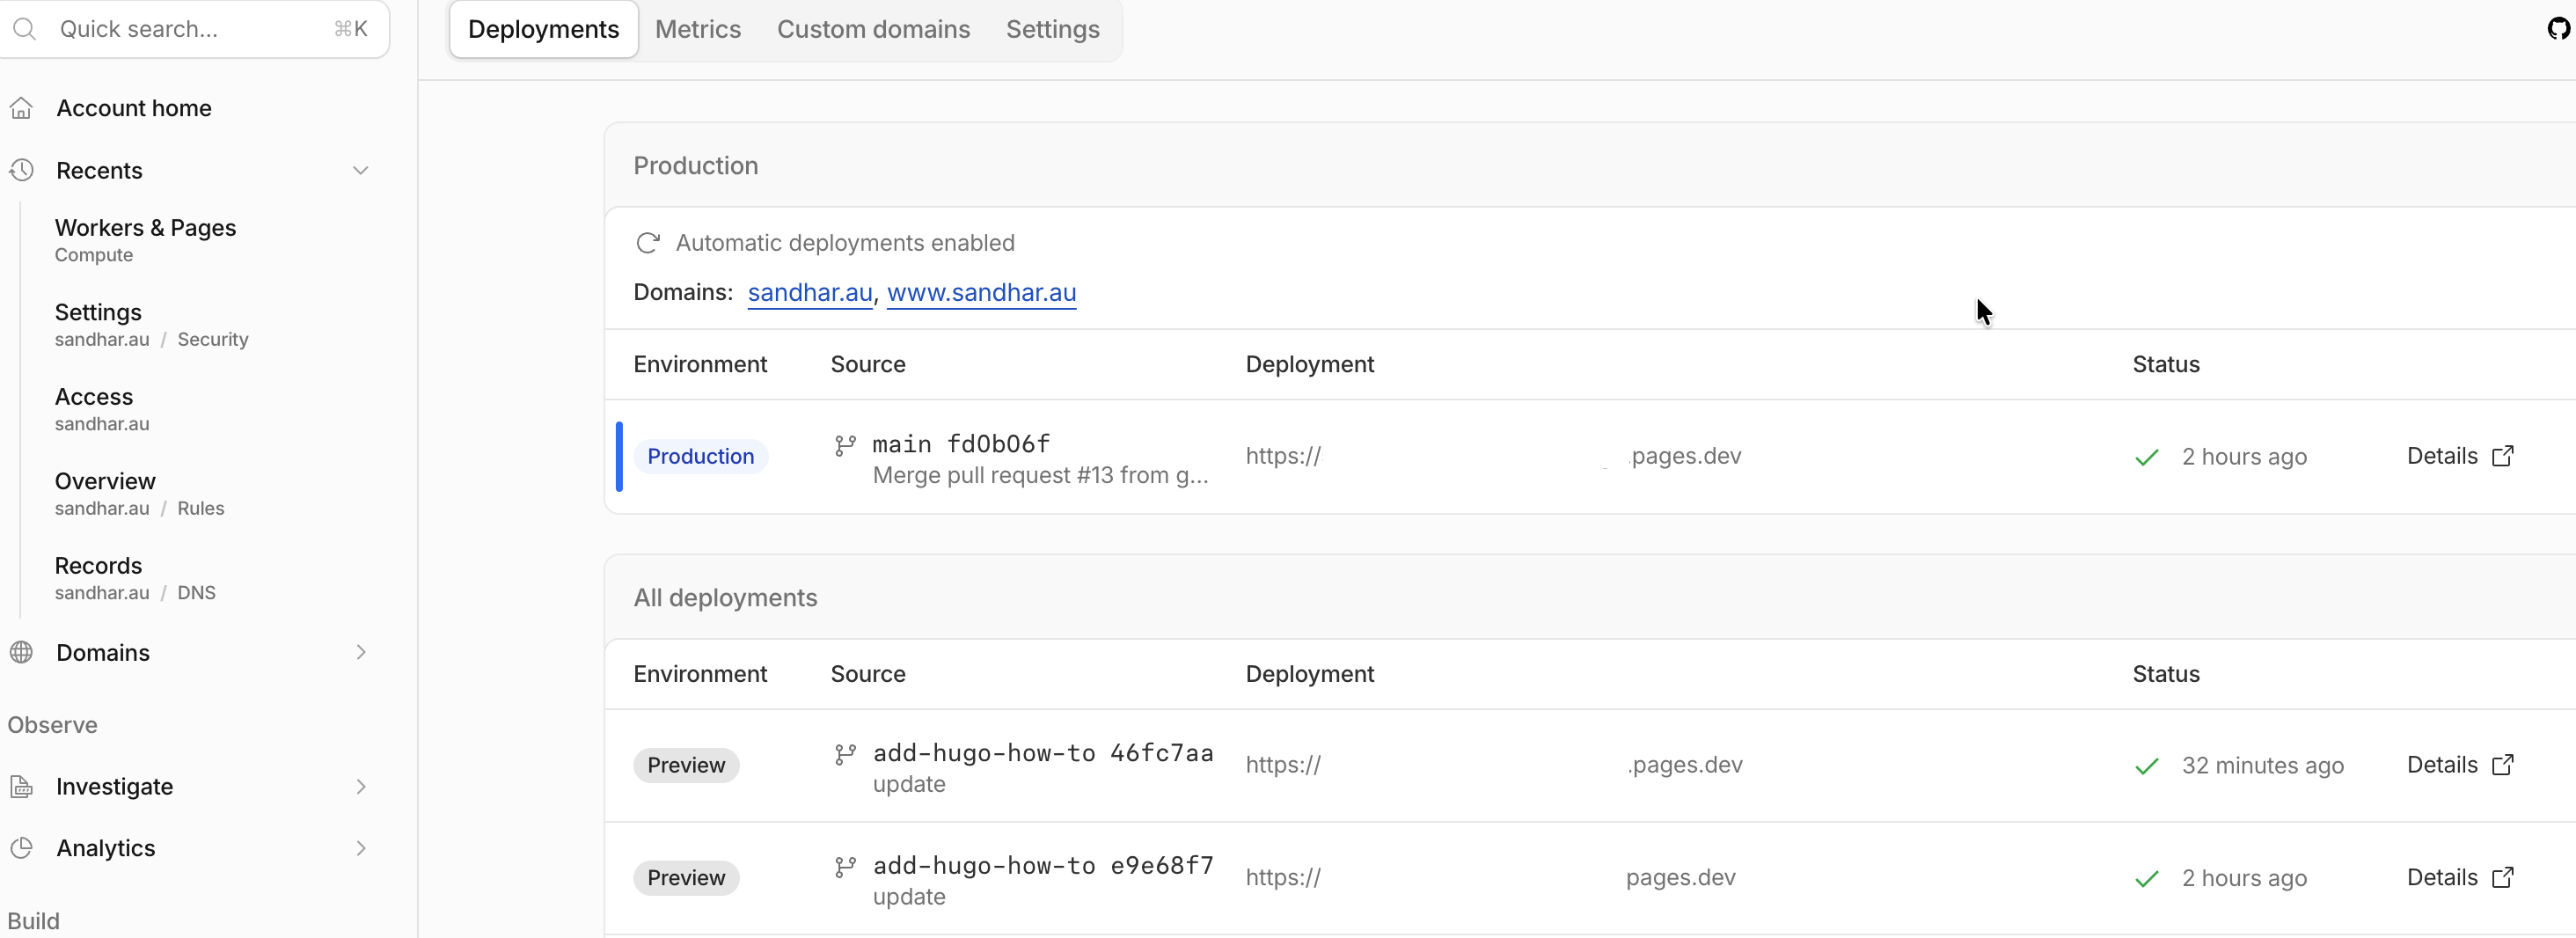
Every push to GitHub triggers a new build. You can see the build log and status in the Cloudflare dashboard(screenshot below) - each commit shows as a separate deployment with its own build time and status. This allows you to view each new build from every commit.
Step 6: Set Up the Custom Domain Link to heading
- In your Cloudflare Pages project, go to Custom domains > Set up a custom domain
- Enter your apex domain (e.g.,
sandhar.au) and click Continue - Cloudflare will add the necessary DNS records - an
AAAArecord for IPv6 and aCNAMEforwwwif you choose to set it up
If your domain is already managed by Cloudflare, DNS records are added automatically. Cloudflare also provisions an SSL certificate via their universal SSL.
With the domain on Cloudflare, DNS propagation is near instant since the authoritative nameservers are Cloudflare’s.
Step 7: DNS Tips Link to heading
A few things I learned:
- Apex domain vs
www: Cloudflare Pages supports both. The apex uses aCNAMEflattening approach (Cloudflare resolves it at the edge). Add a redirect fromwwwto apex or vice versa via Page Rules or Bulk Redirects. - SSL/TLS mode: Set to
Full (strict)in Cloudflare’s SSL/TLS settings - Pages provides a valid origin certificate. - Always Use HTTPS: Turn this on in Cloudflare’s edge certificates settings.
The Final Result Link to heading
That’s it. The site is live at sandhar.au, served from Cloudflare’s edge network, automatically deployed from GitHub on every push, fully HTTPS, and costing nothing.
The entire stack:
GitHub (source) >>> Cloudflare Pages (build + CDN) >>> Cloudflare DNS (custom domain)
No servers to manage, no bills to pay, and Hugo builds are fast enough that deploys complete in under two minutes. A pretty solid/low maintenance setup for a personal site.